
***NOTE: This was tested using the ELMO TT-12w and not the TT-12i***
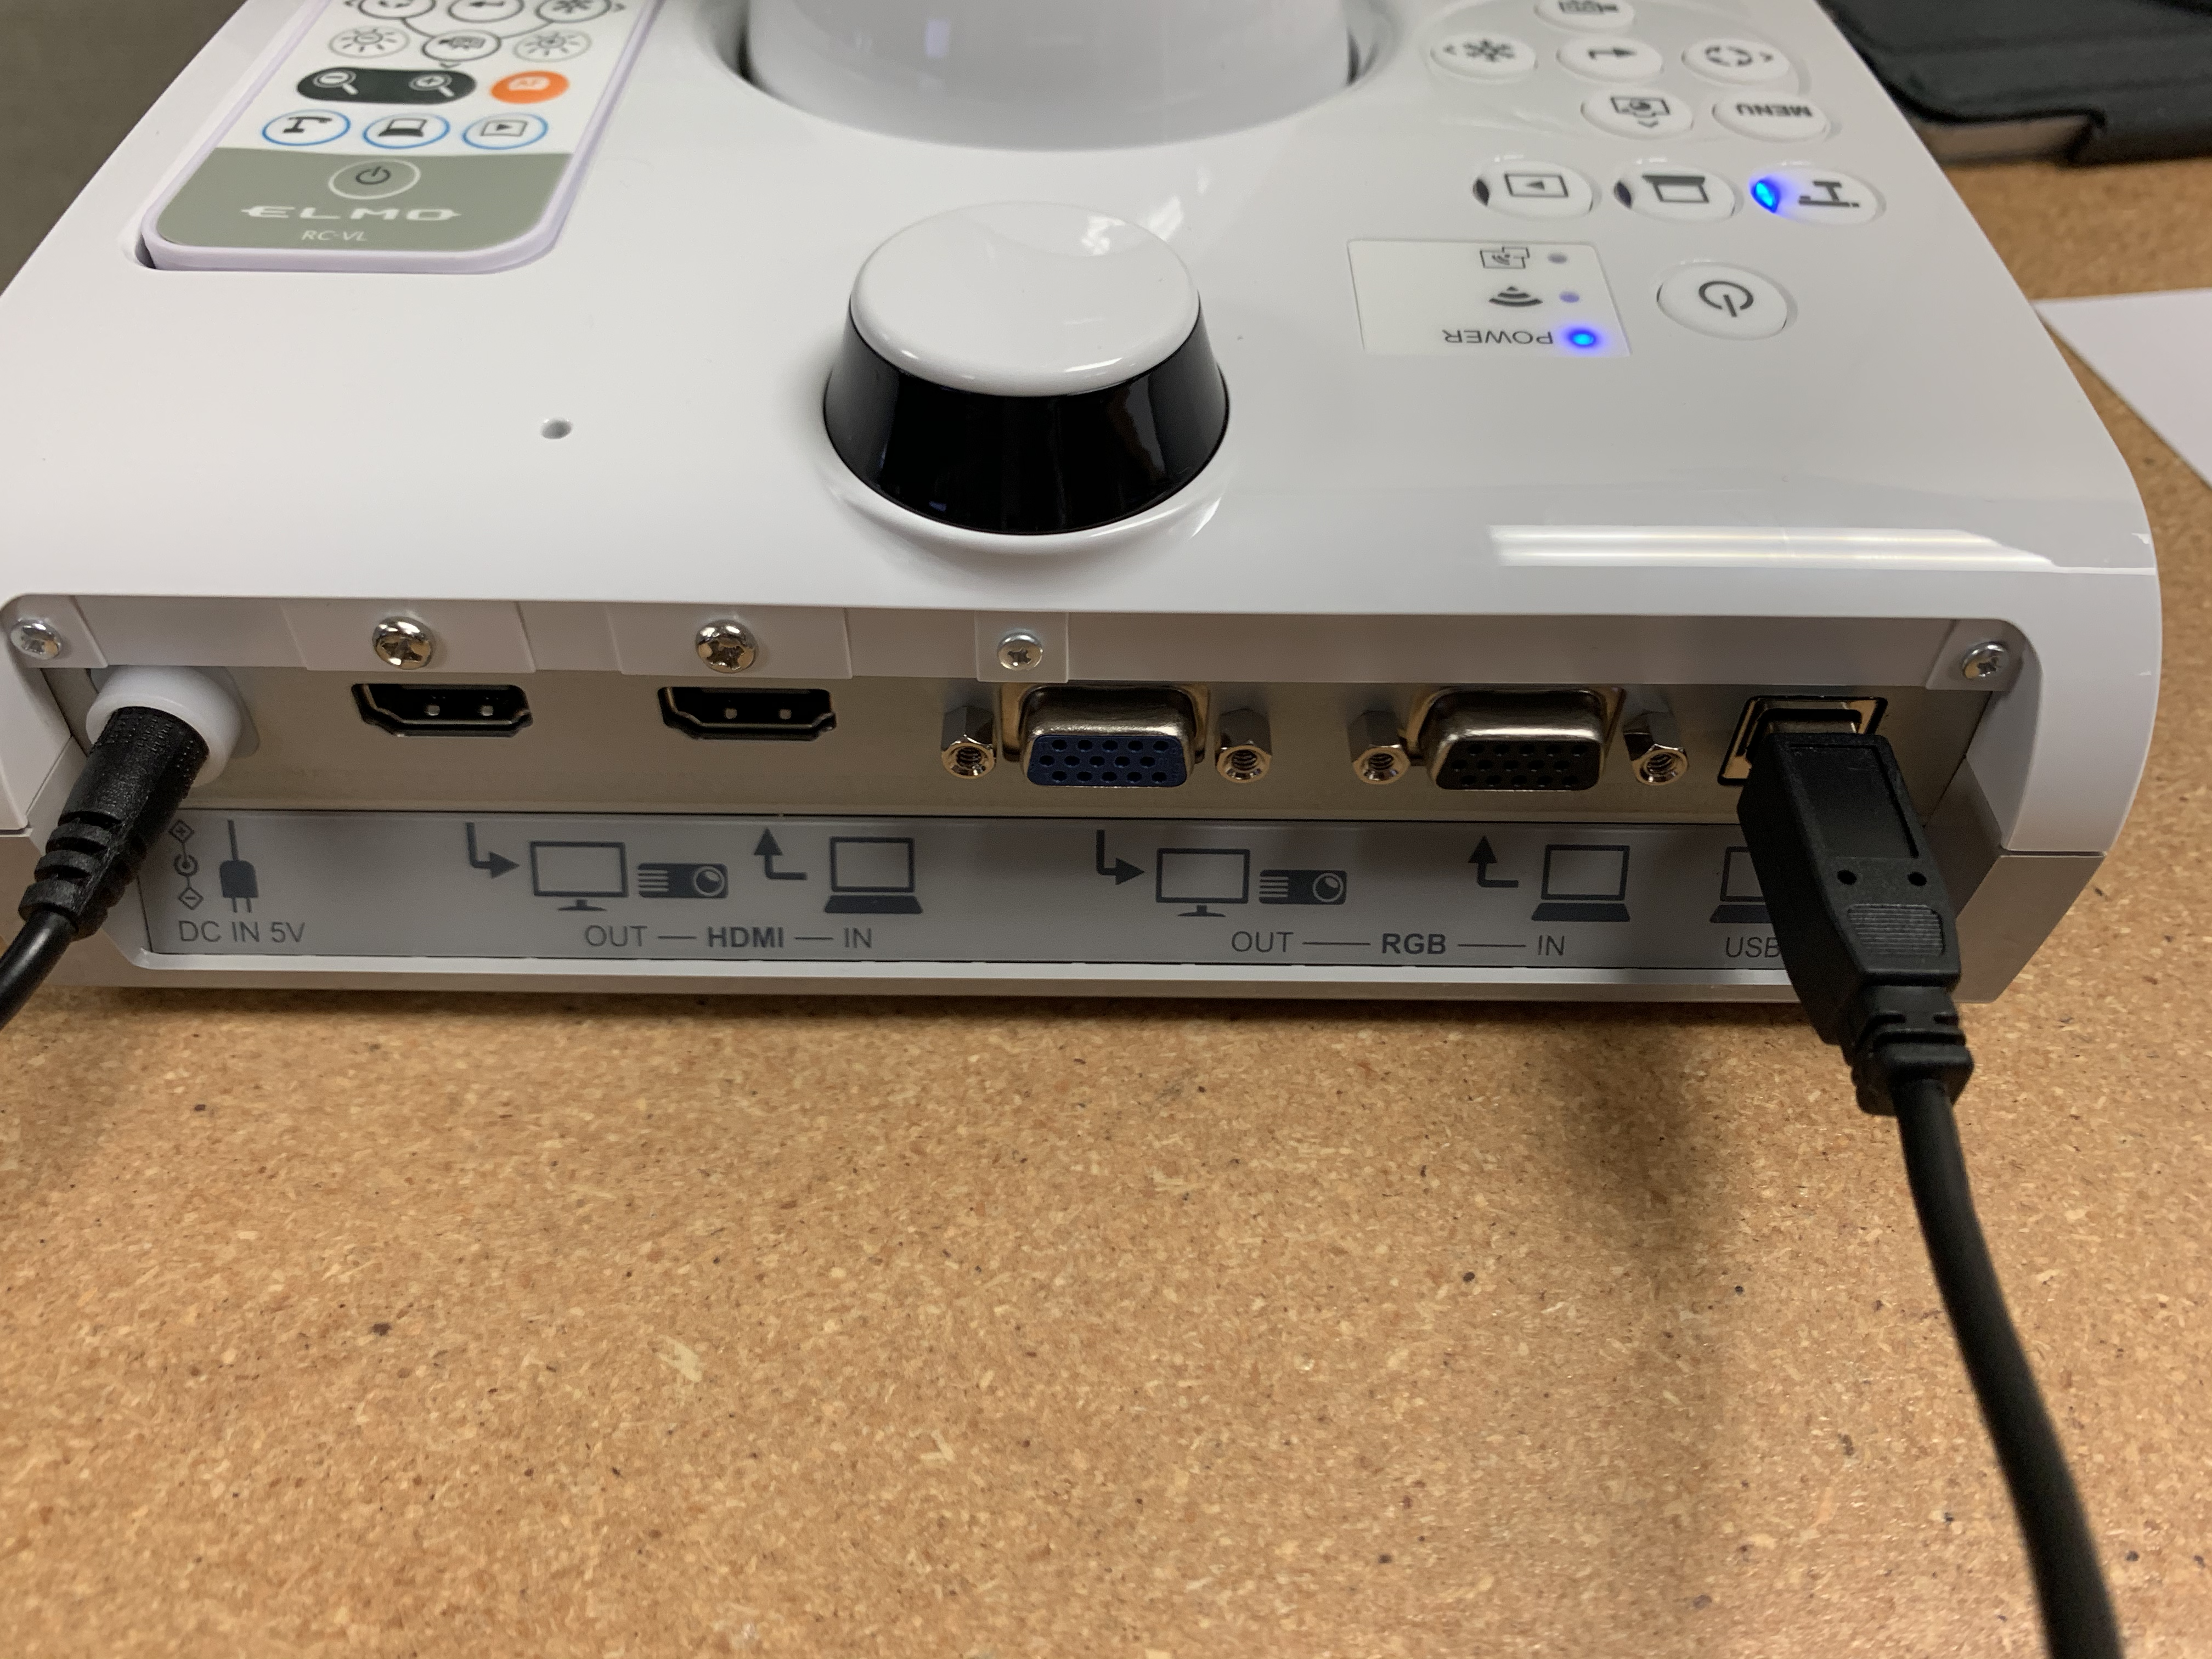
STEP 1: Power the document camera ON and connect to an external monitor via HDMI or VGA through the output port on the ELMO
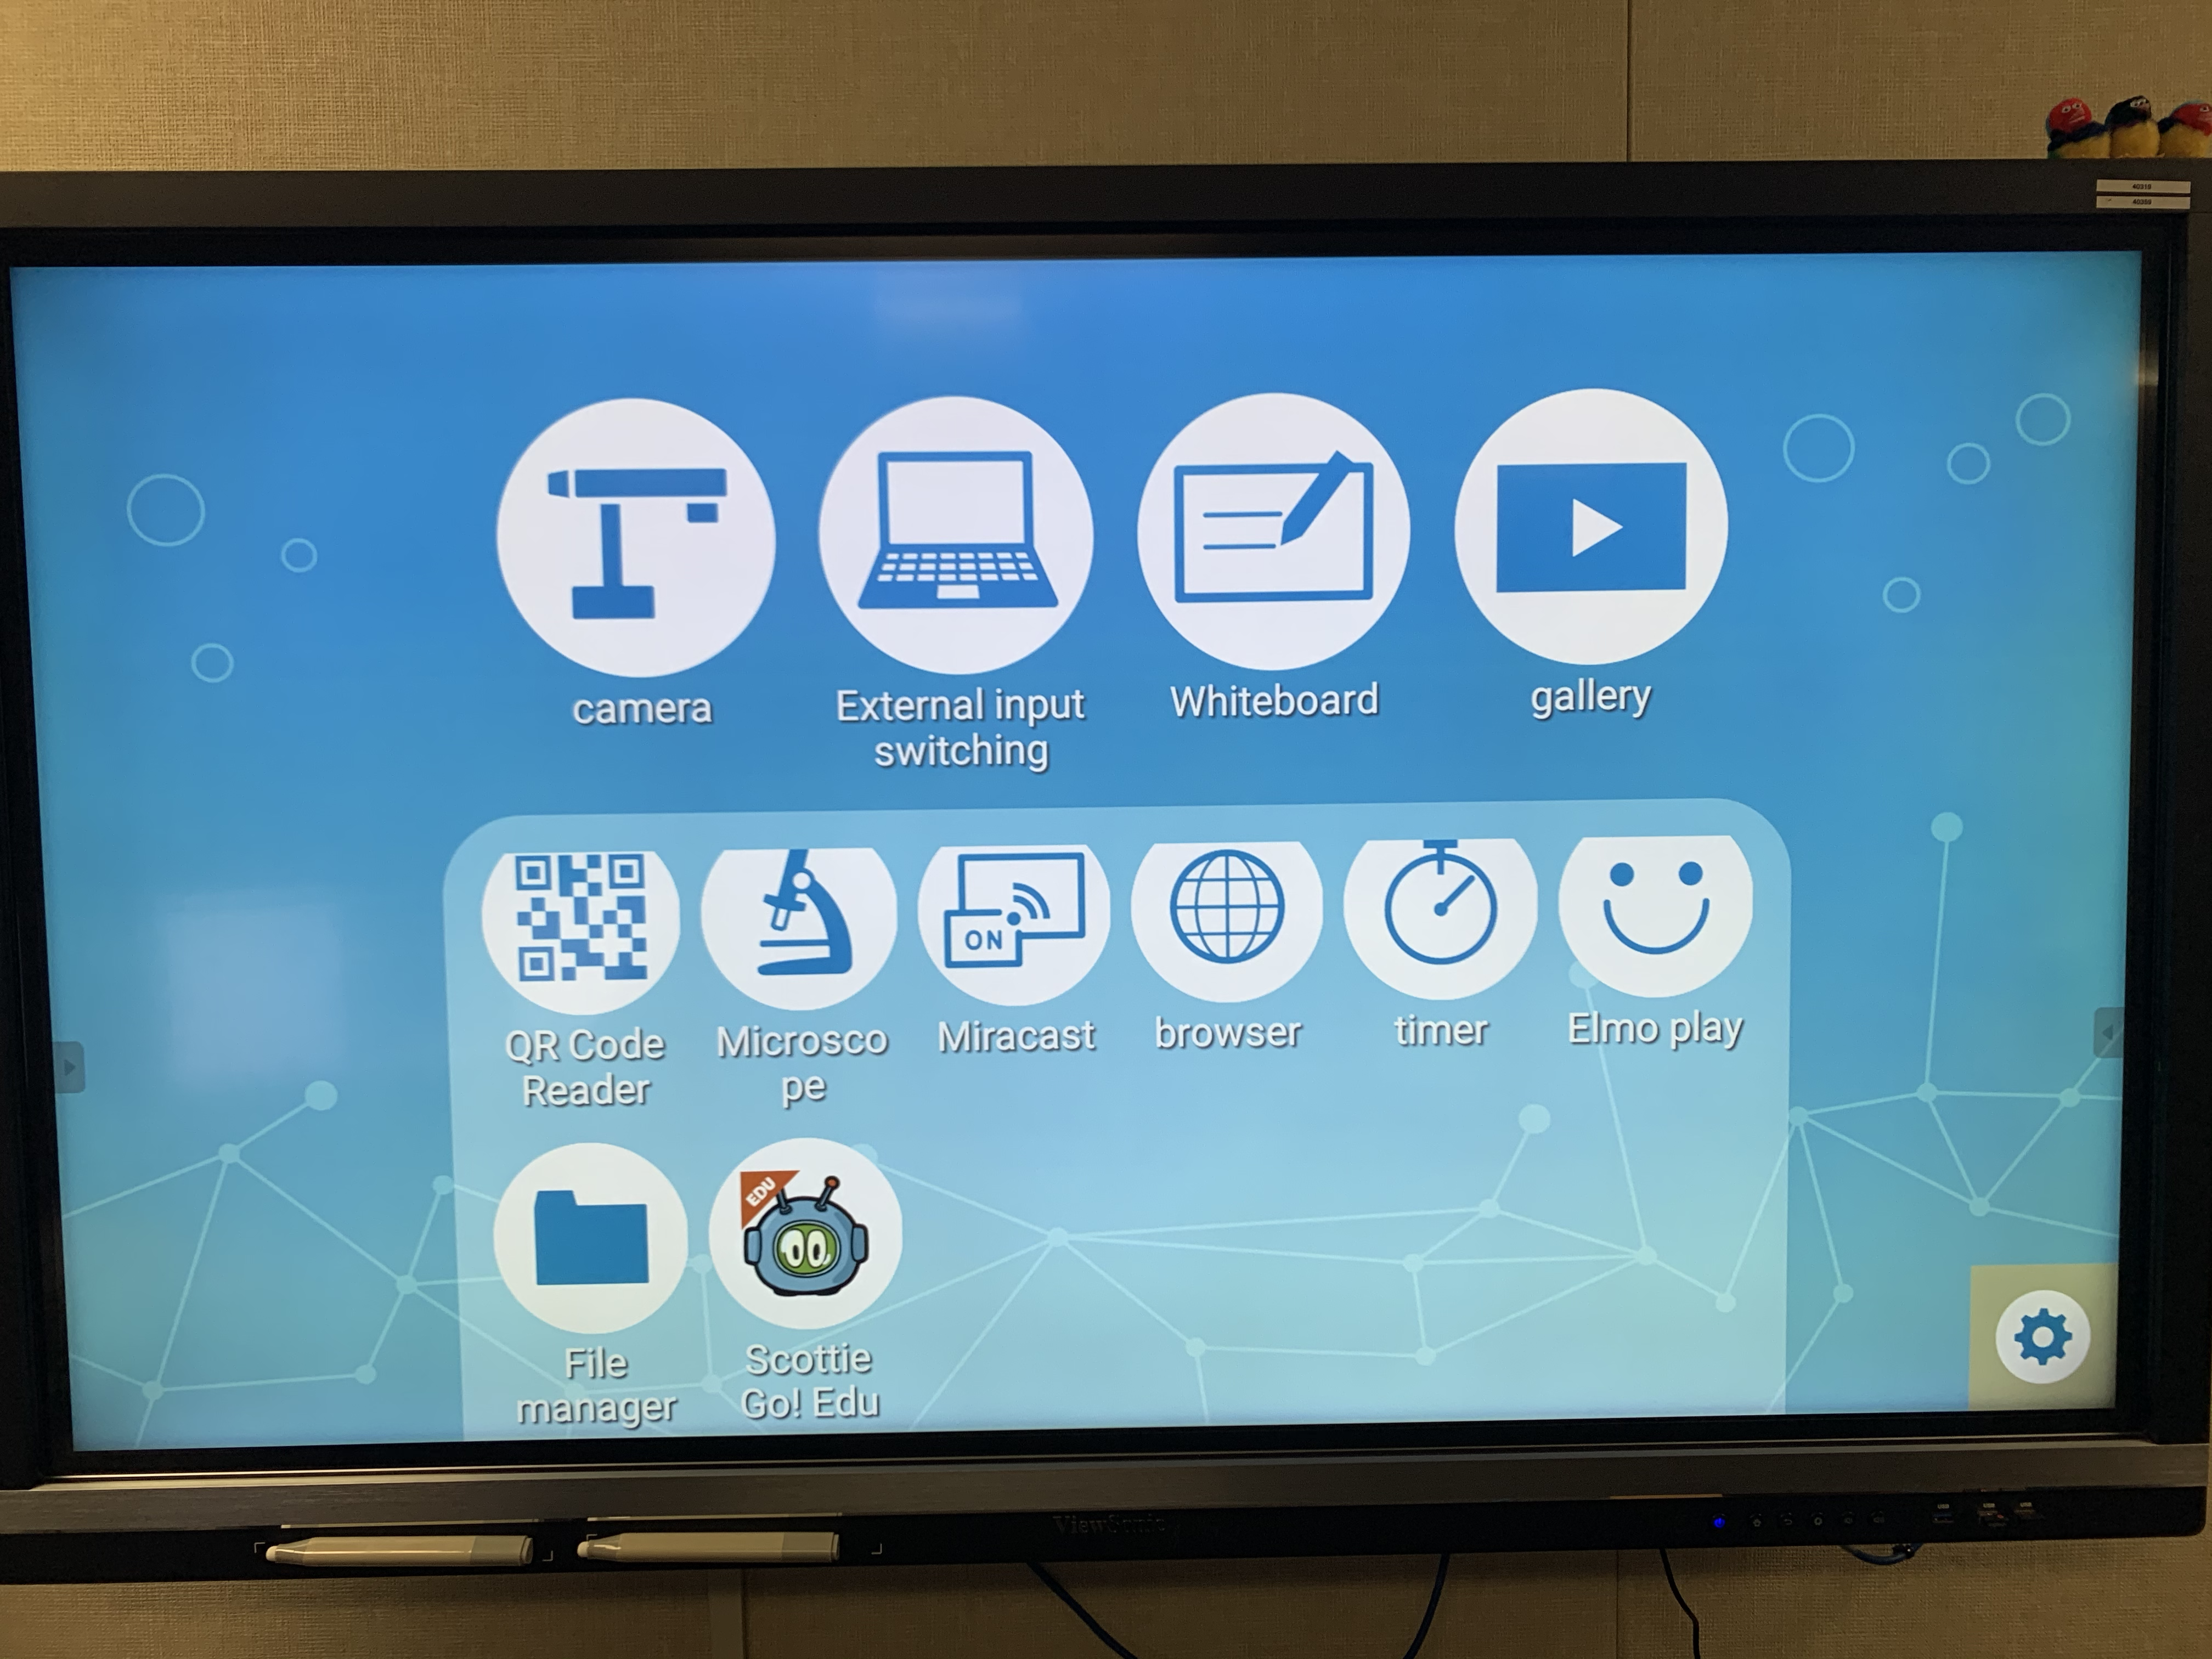
STEP 2: Navigate to the settings of the ELMO on the screen (icon gear on the lower right)
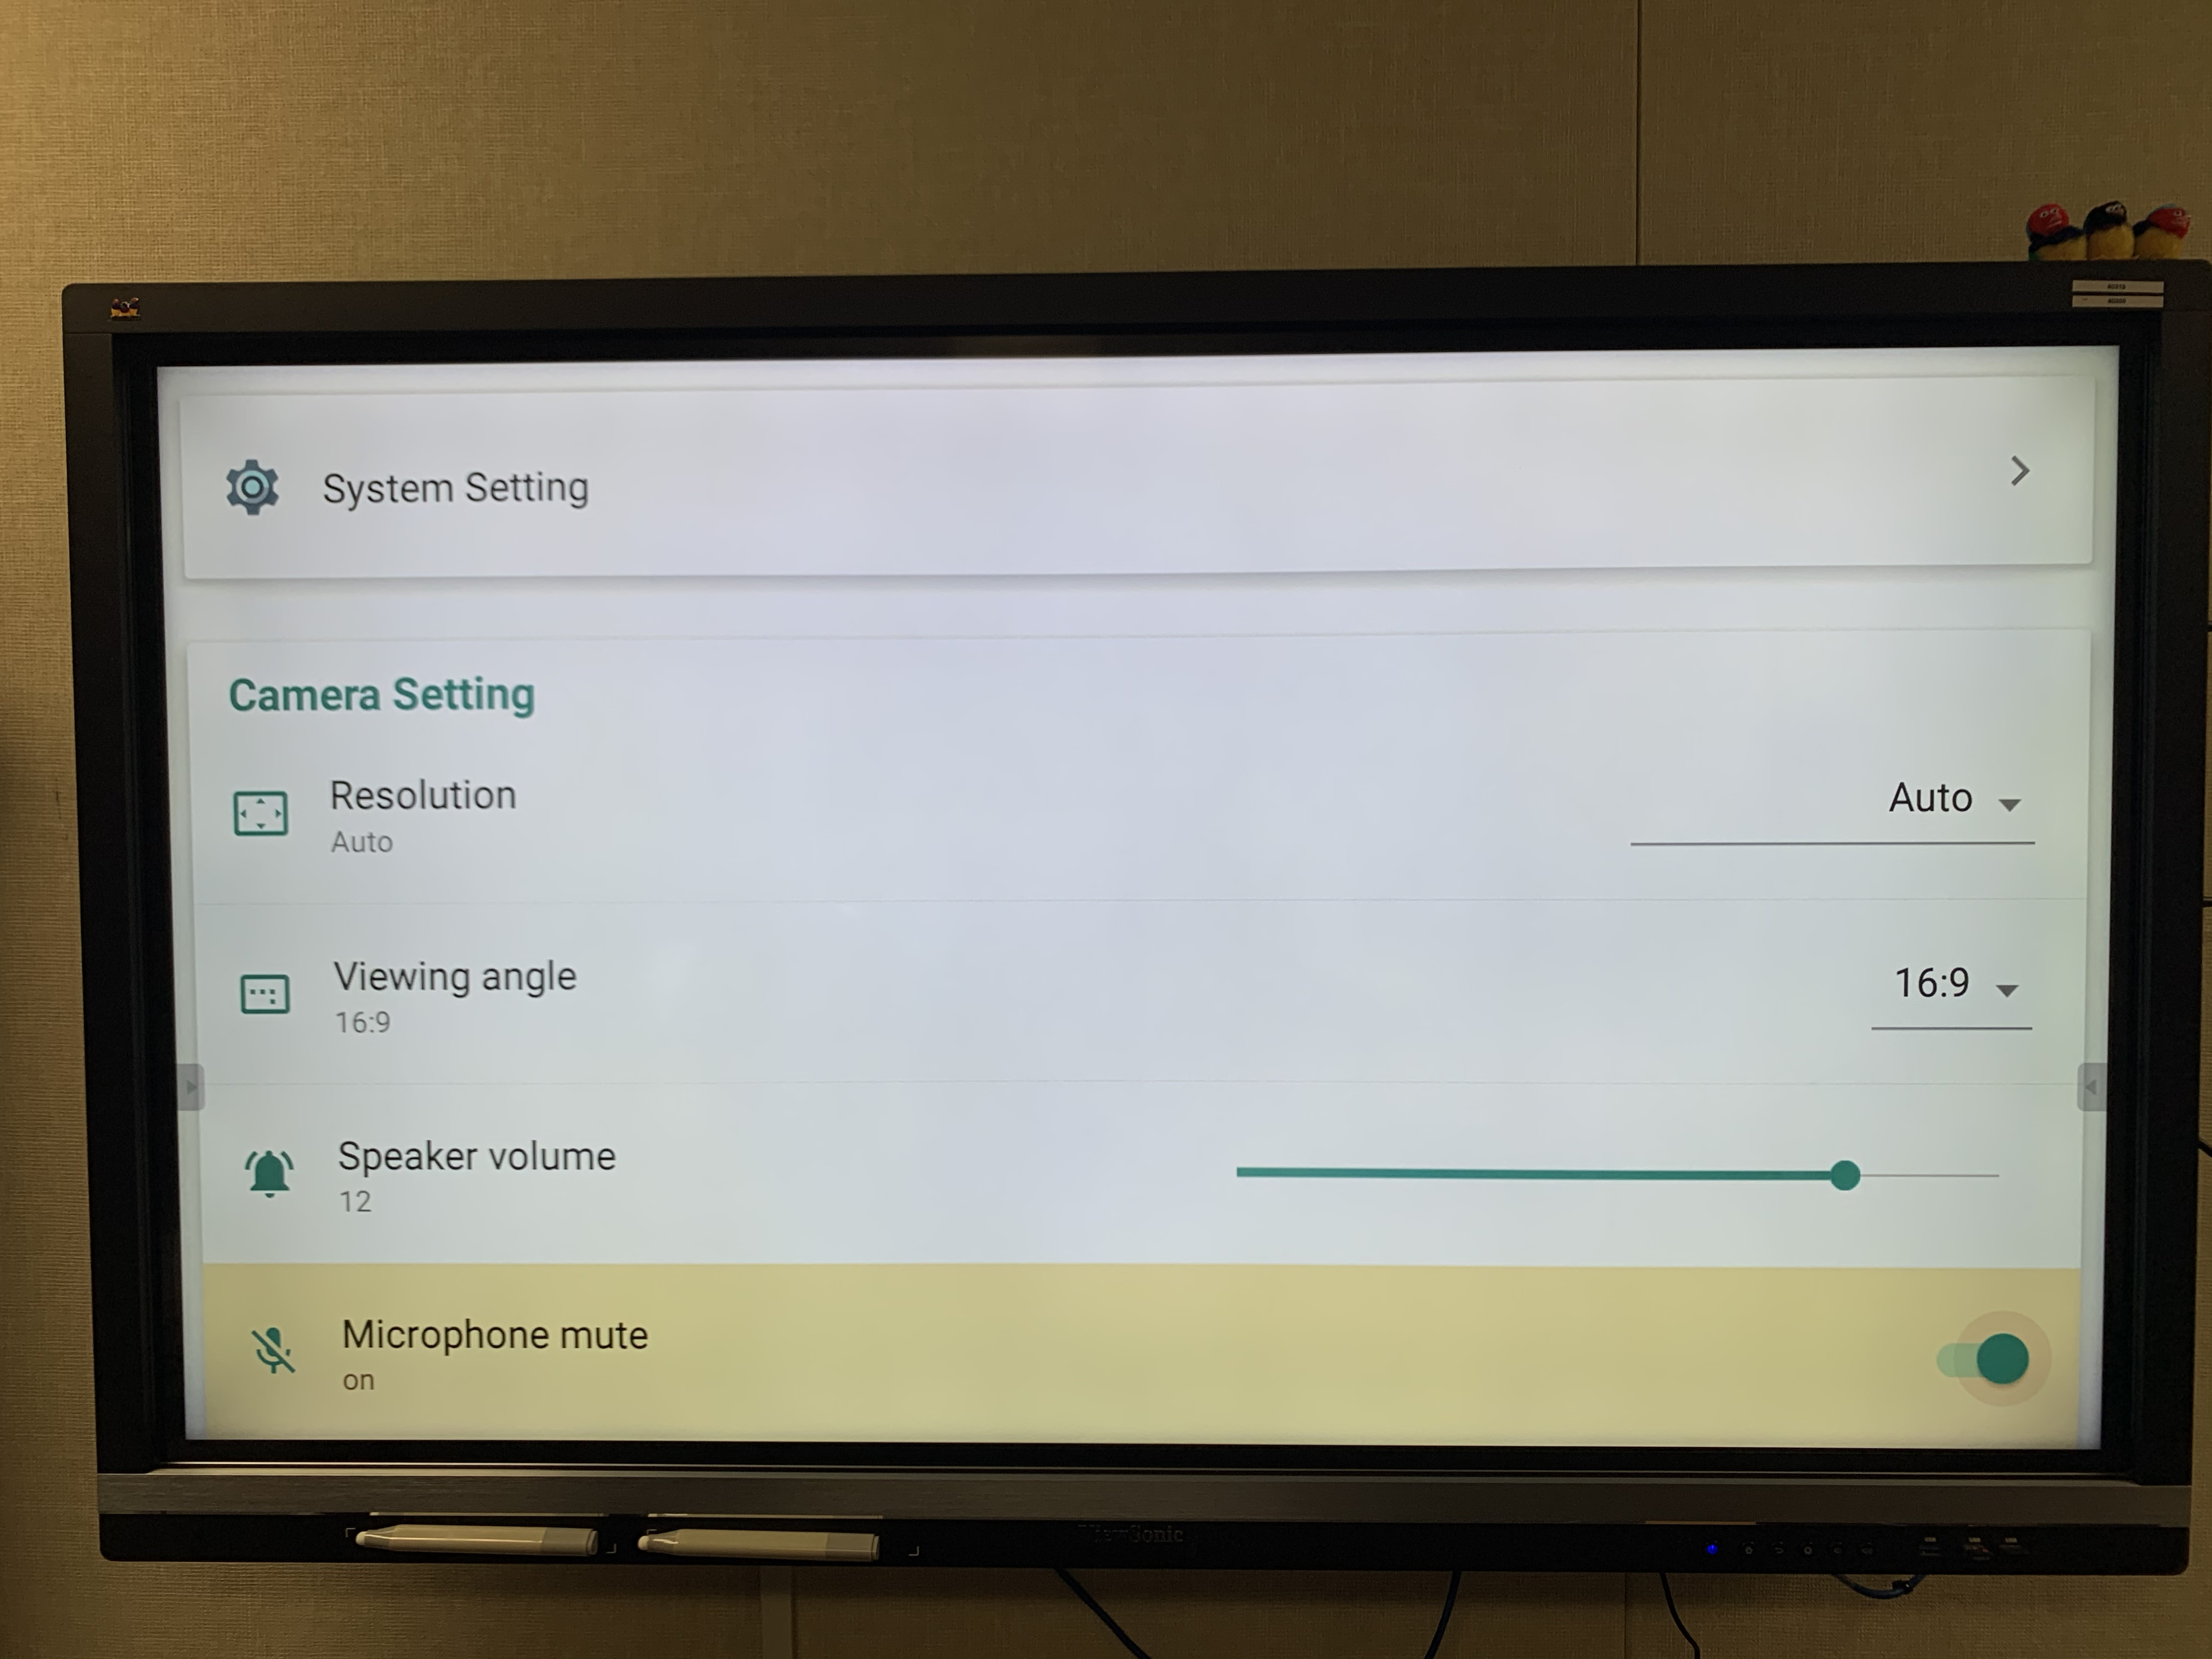
STEP 3: Scroll down in the settings and toggle ON the microphone mute button
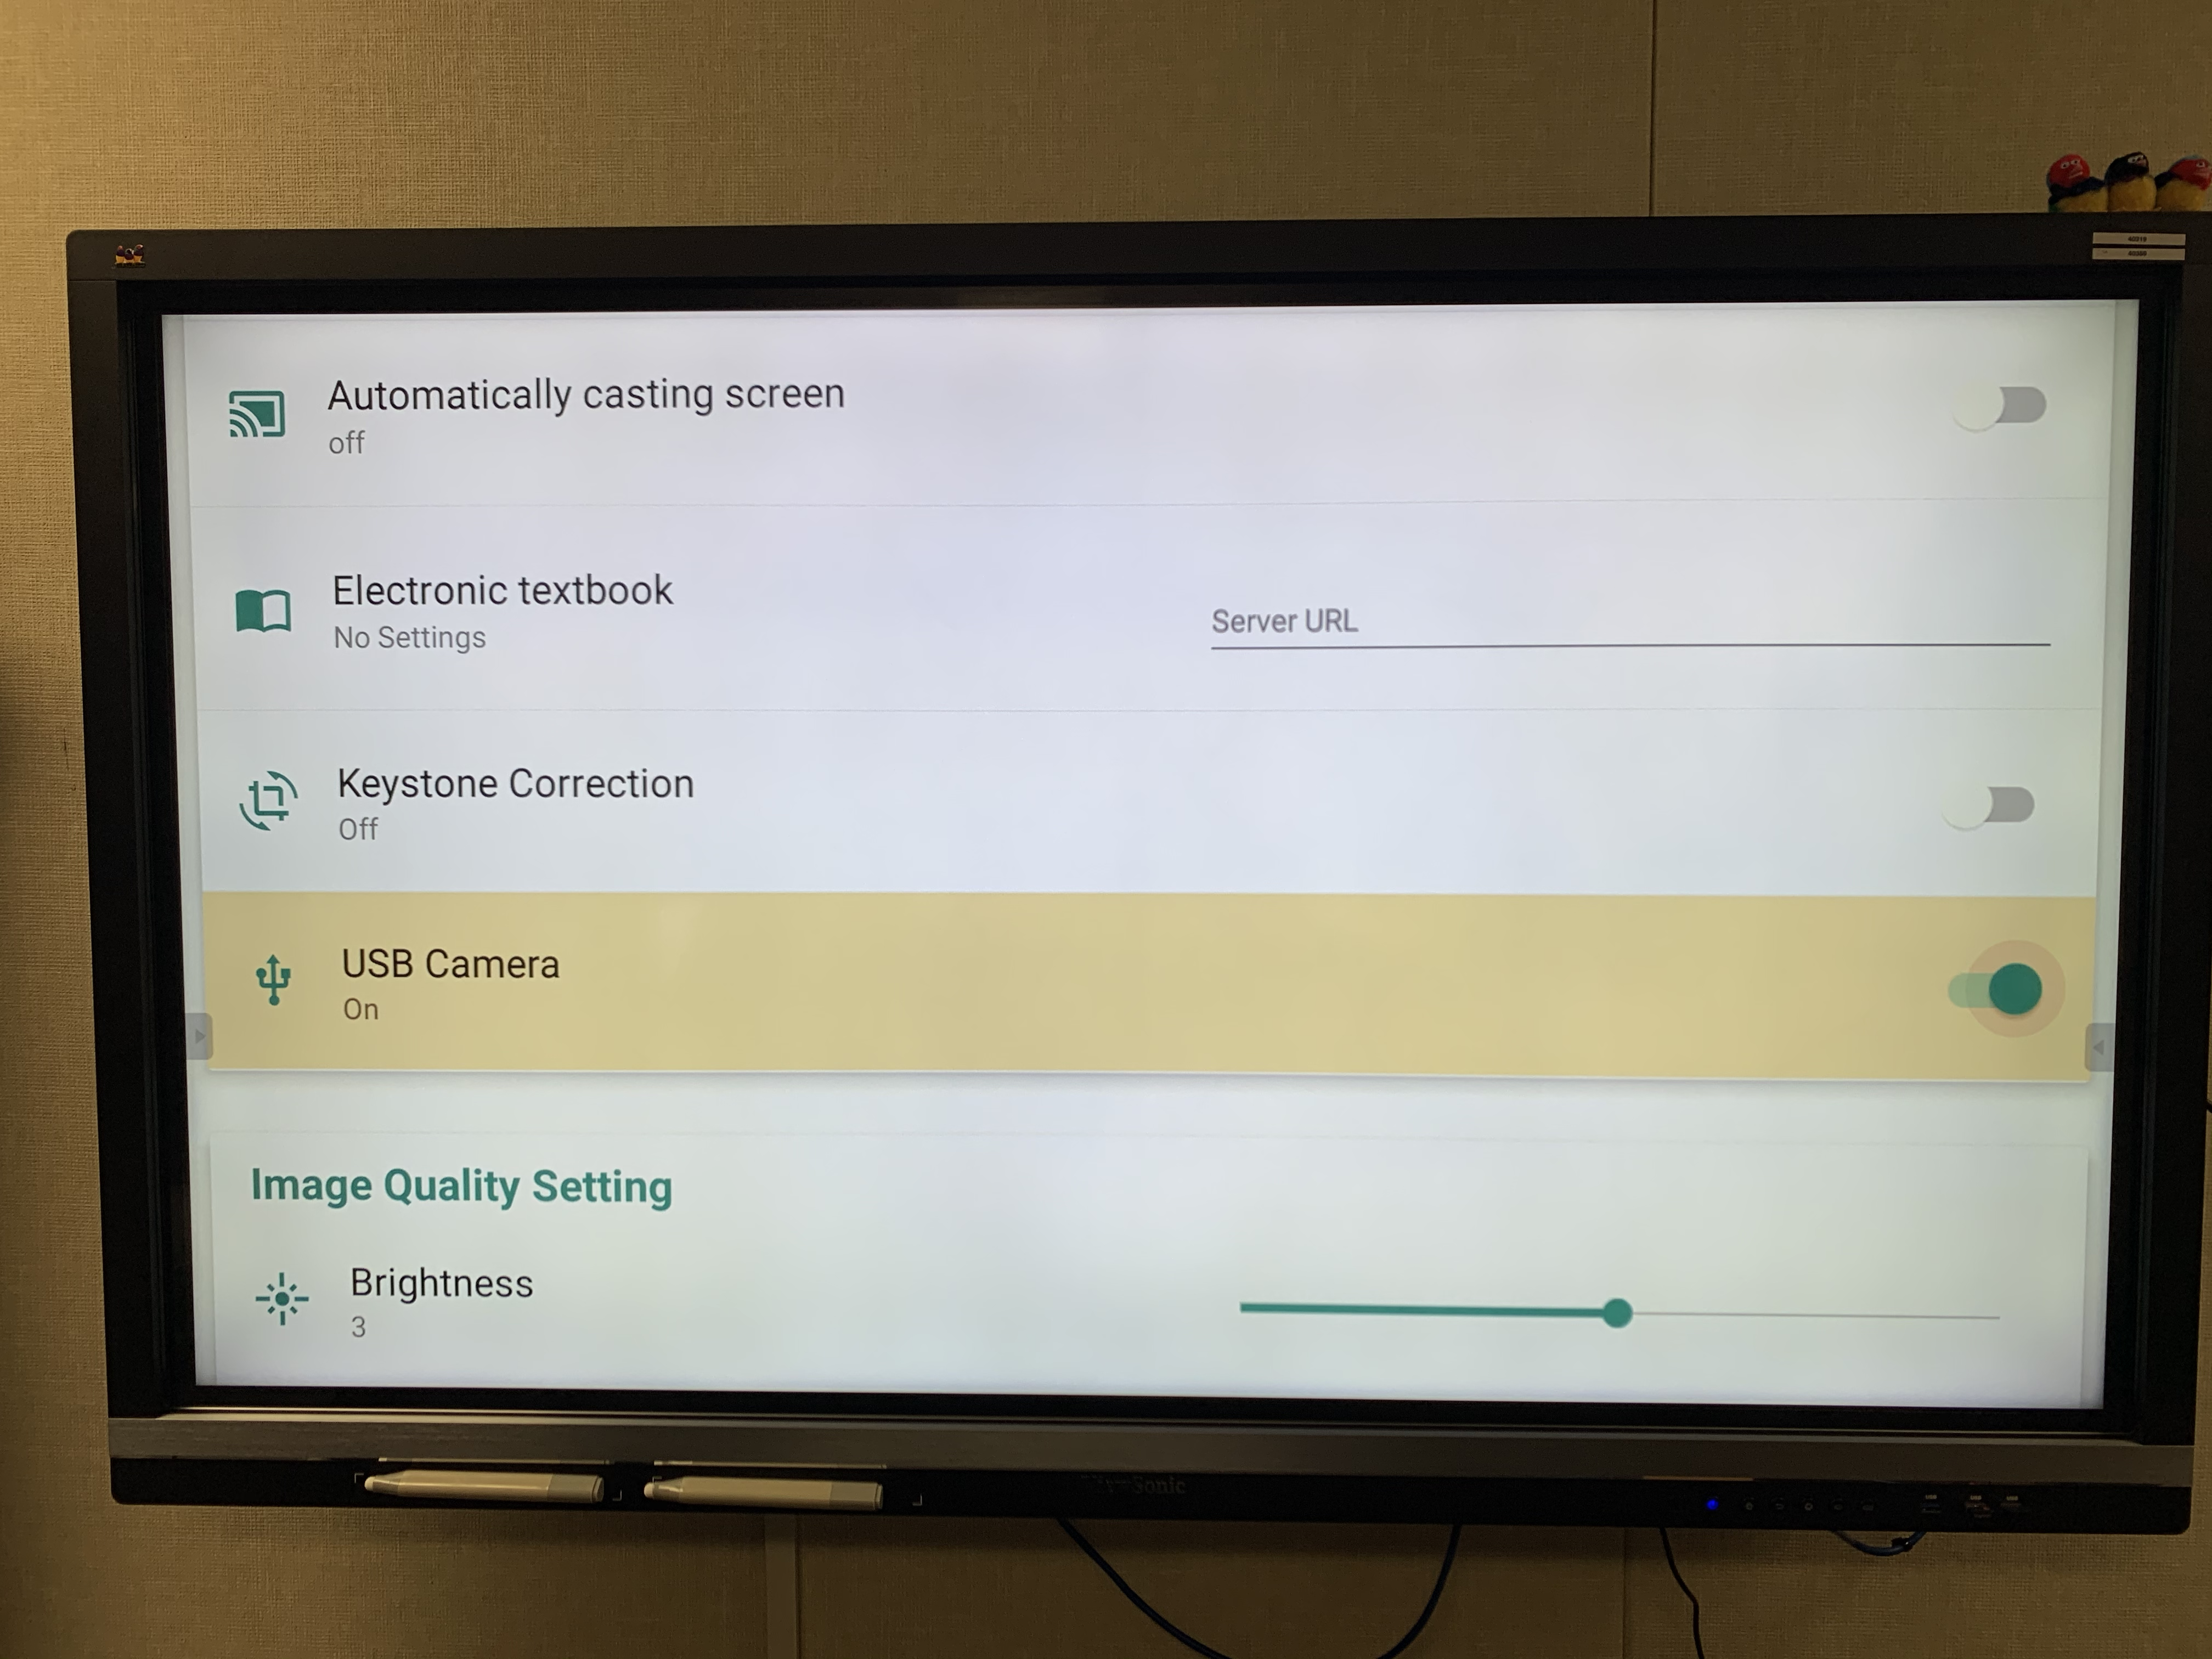
STEP 4: Scroll down and toggle ON the USB Camera
STEP 5: Plug the doc cam into the MacBook using the USB cable port from the doc cam to the laptop. This will be a USB-B to USB-A cable.
STEP 6: On the Mac go to Self Service (Finder > Applications > Self Service) and under Doc Cam Software, download the ELMO Software

STEP 7: Open the ELMO Software (ELMO Interactive Toolbox) found in Finder > Applications. Click the Mode button icon on the left of the Toolbox widget. 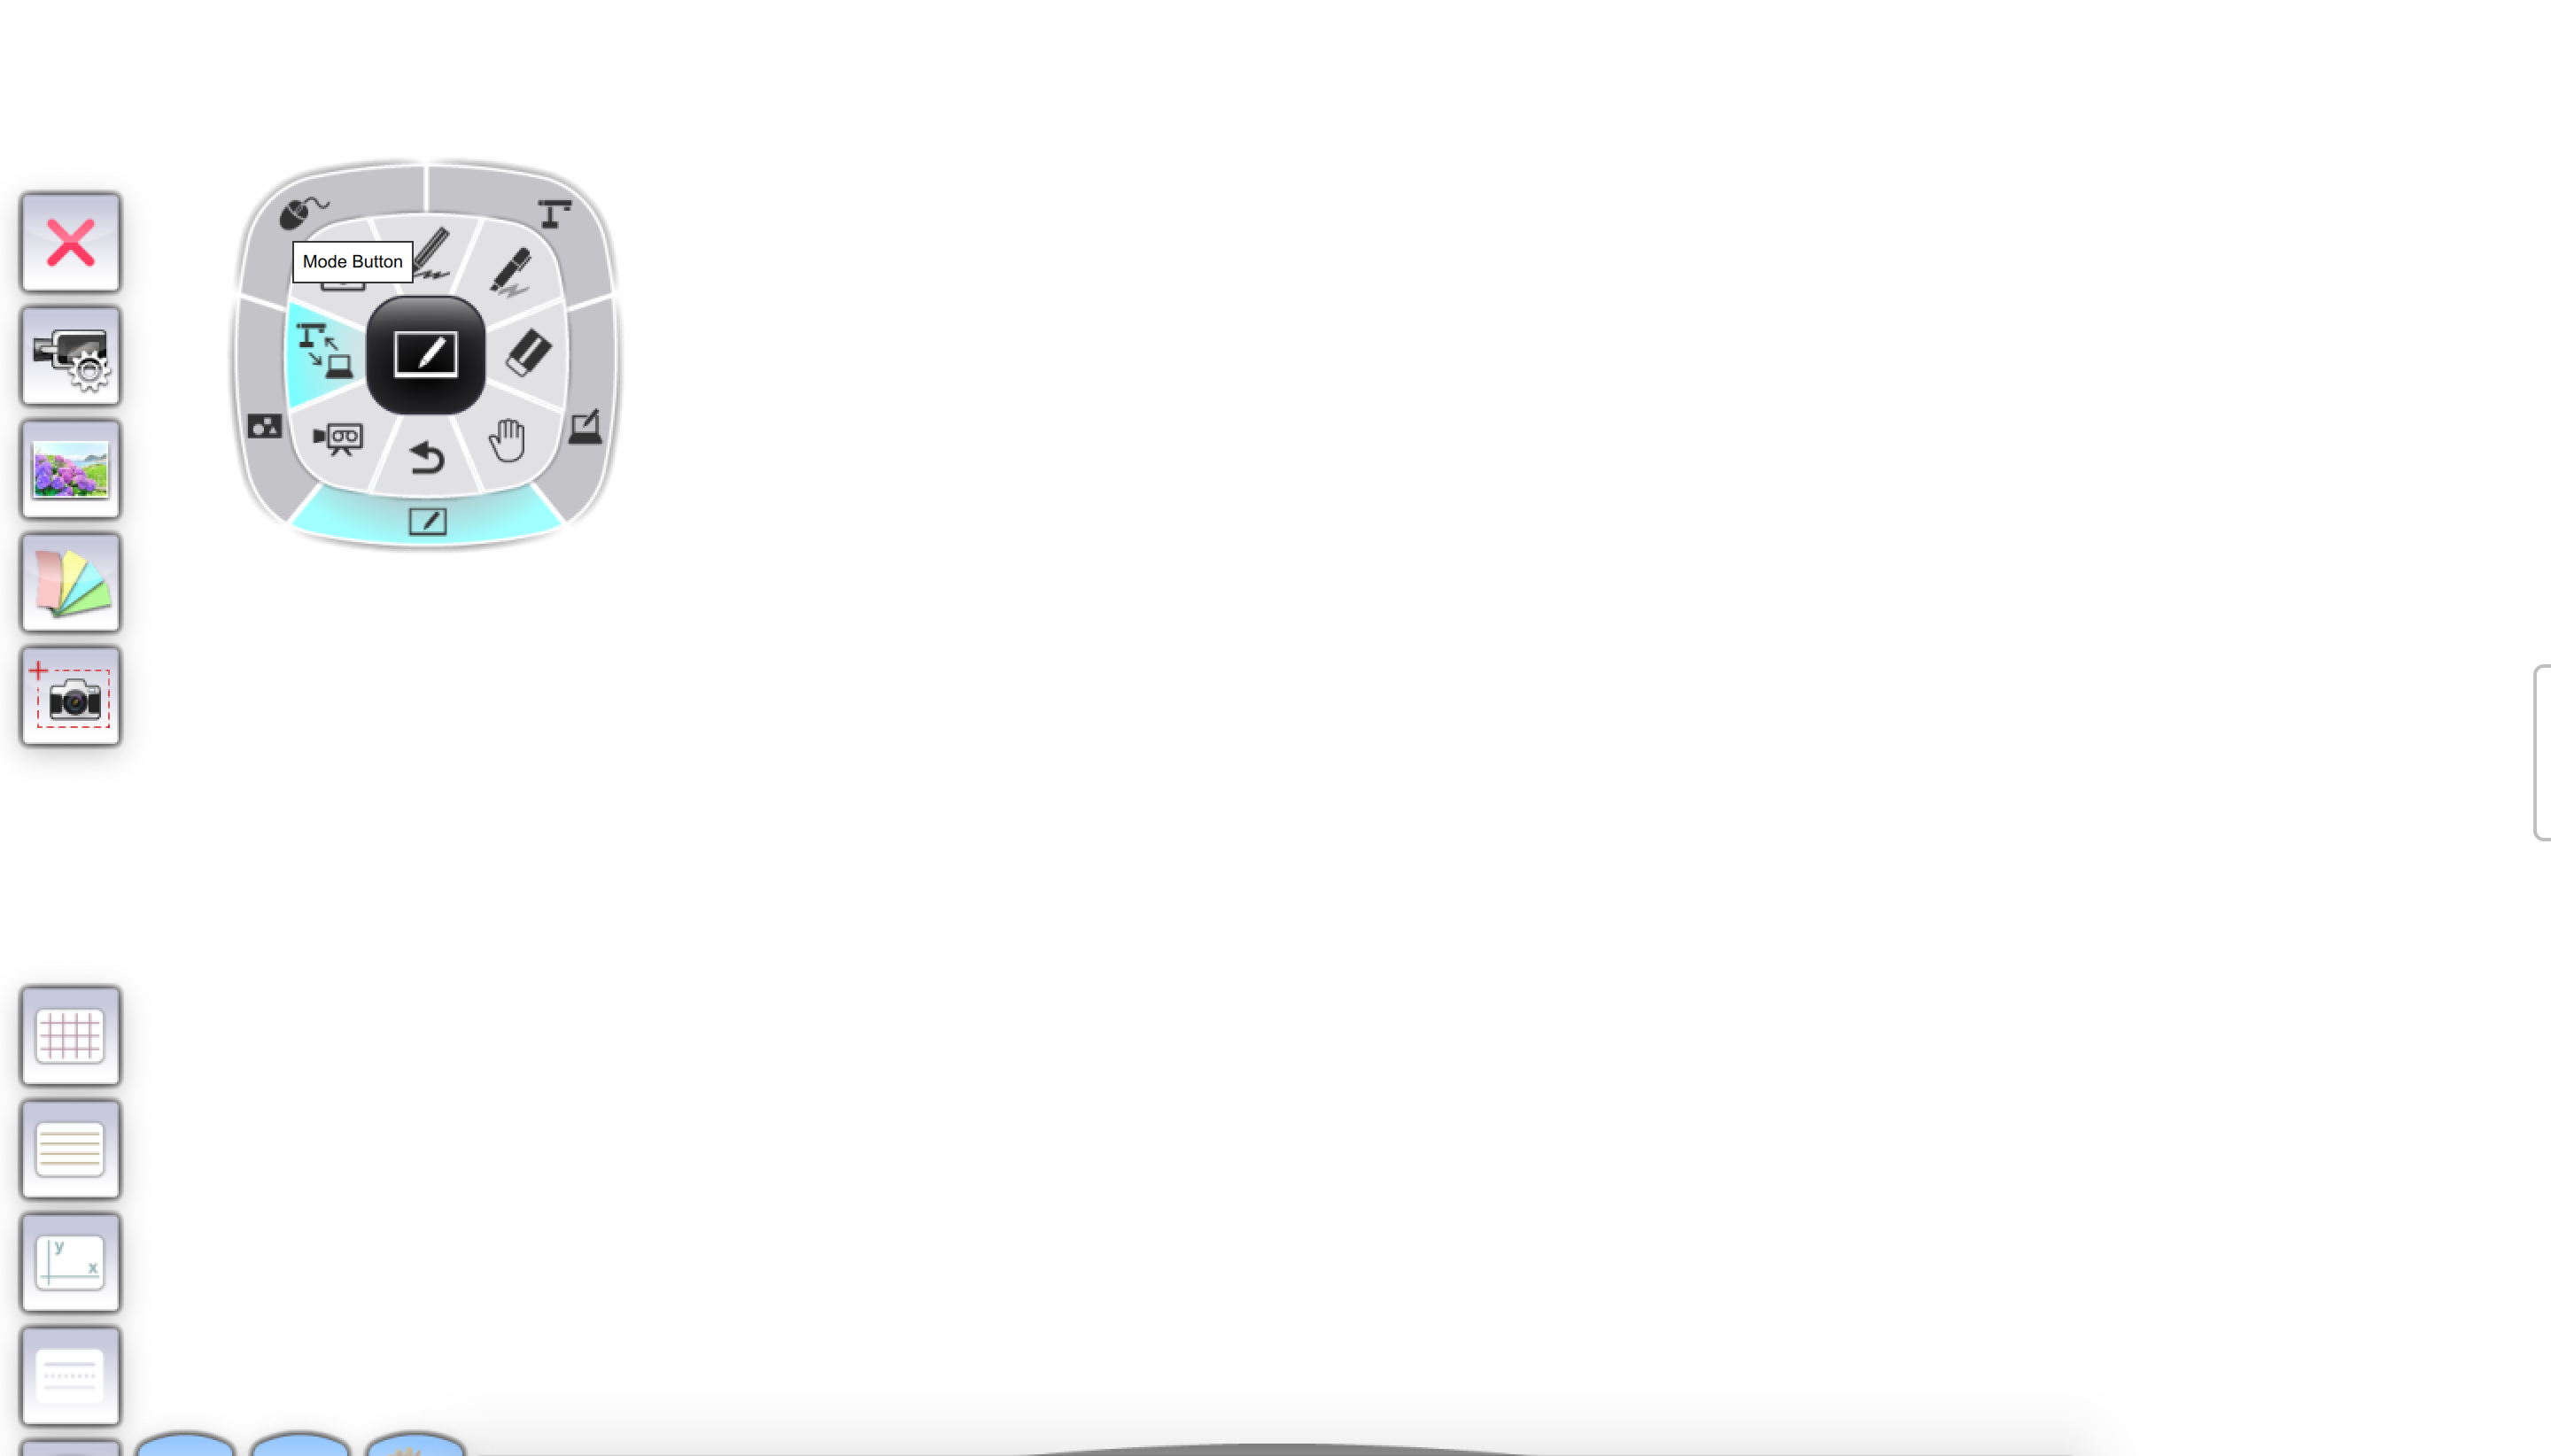
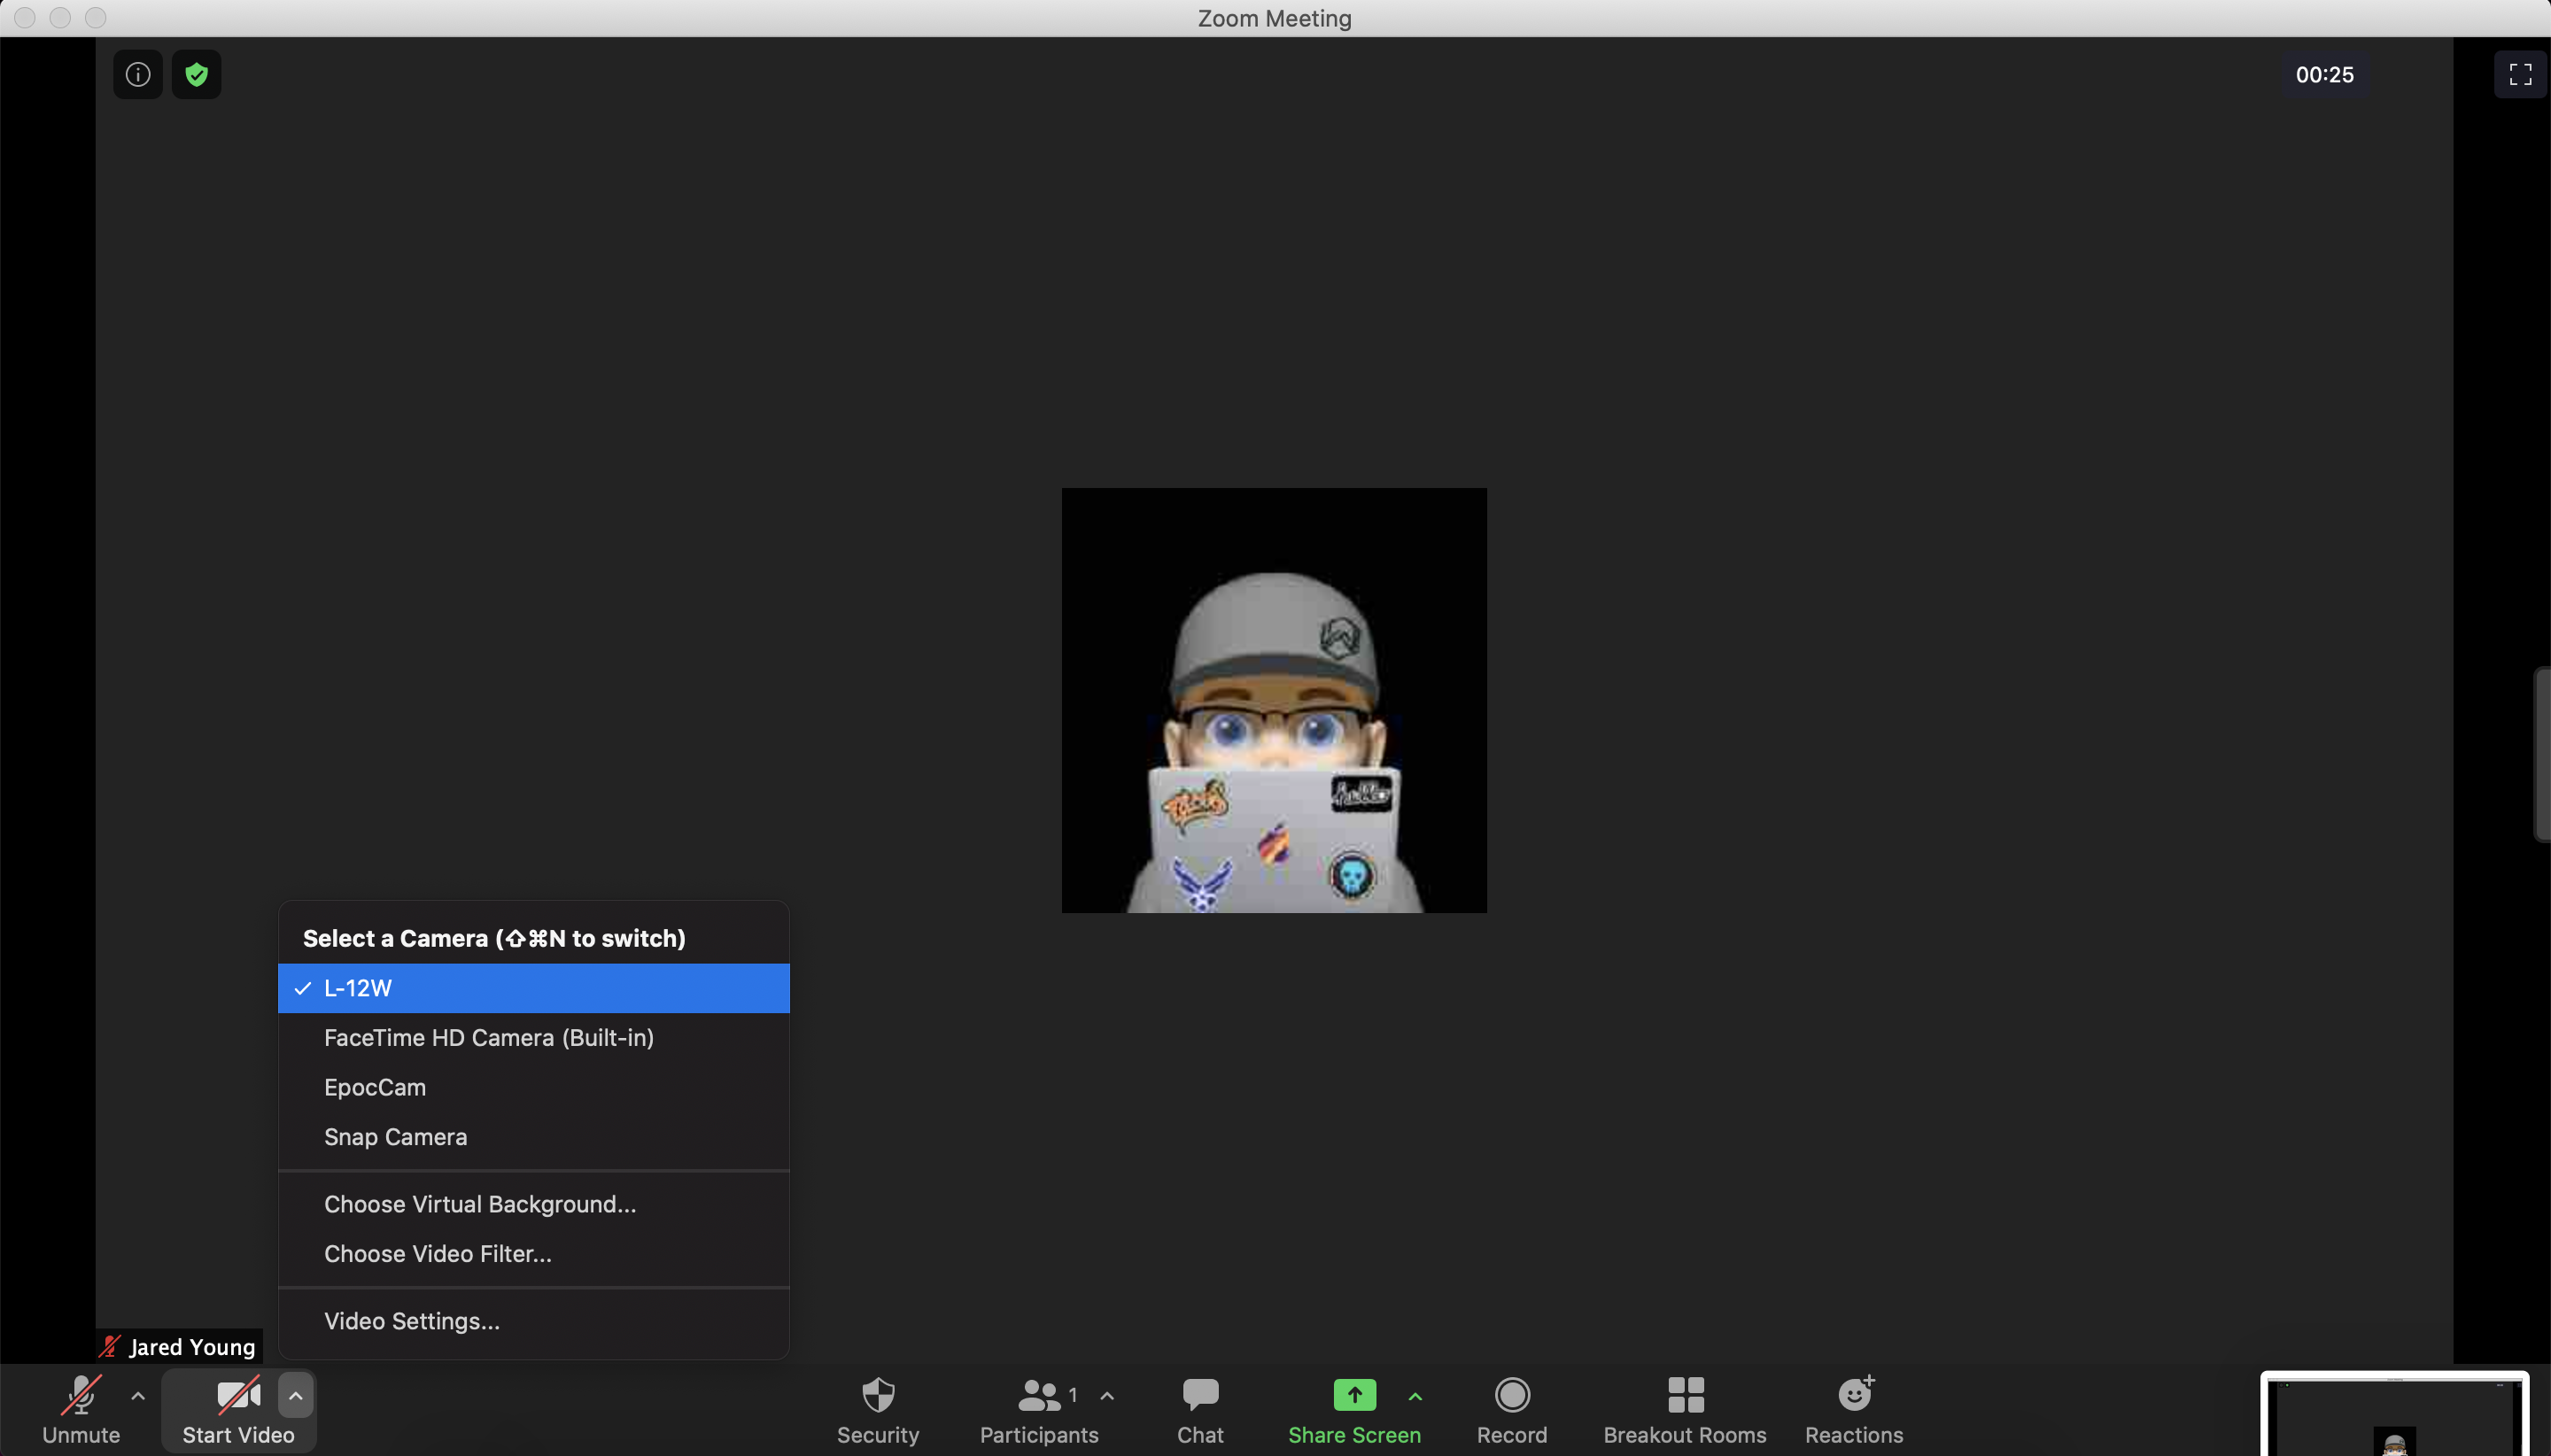
STEP 8: Open Zoom and you can now select the L-12W (or your corresponding model number) camera as your video feed in the zoom meeting.
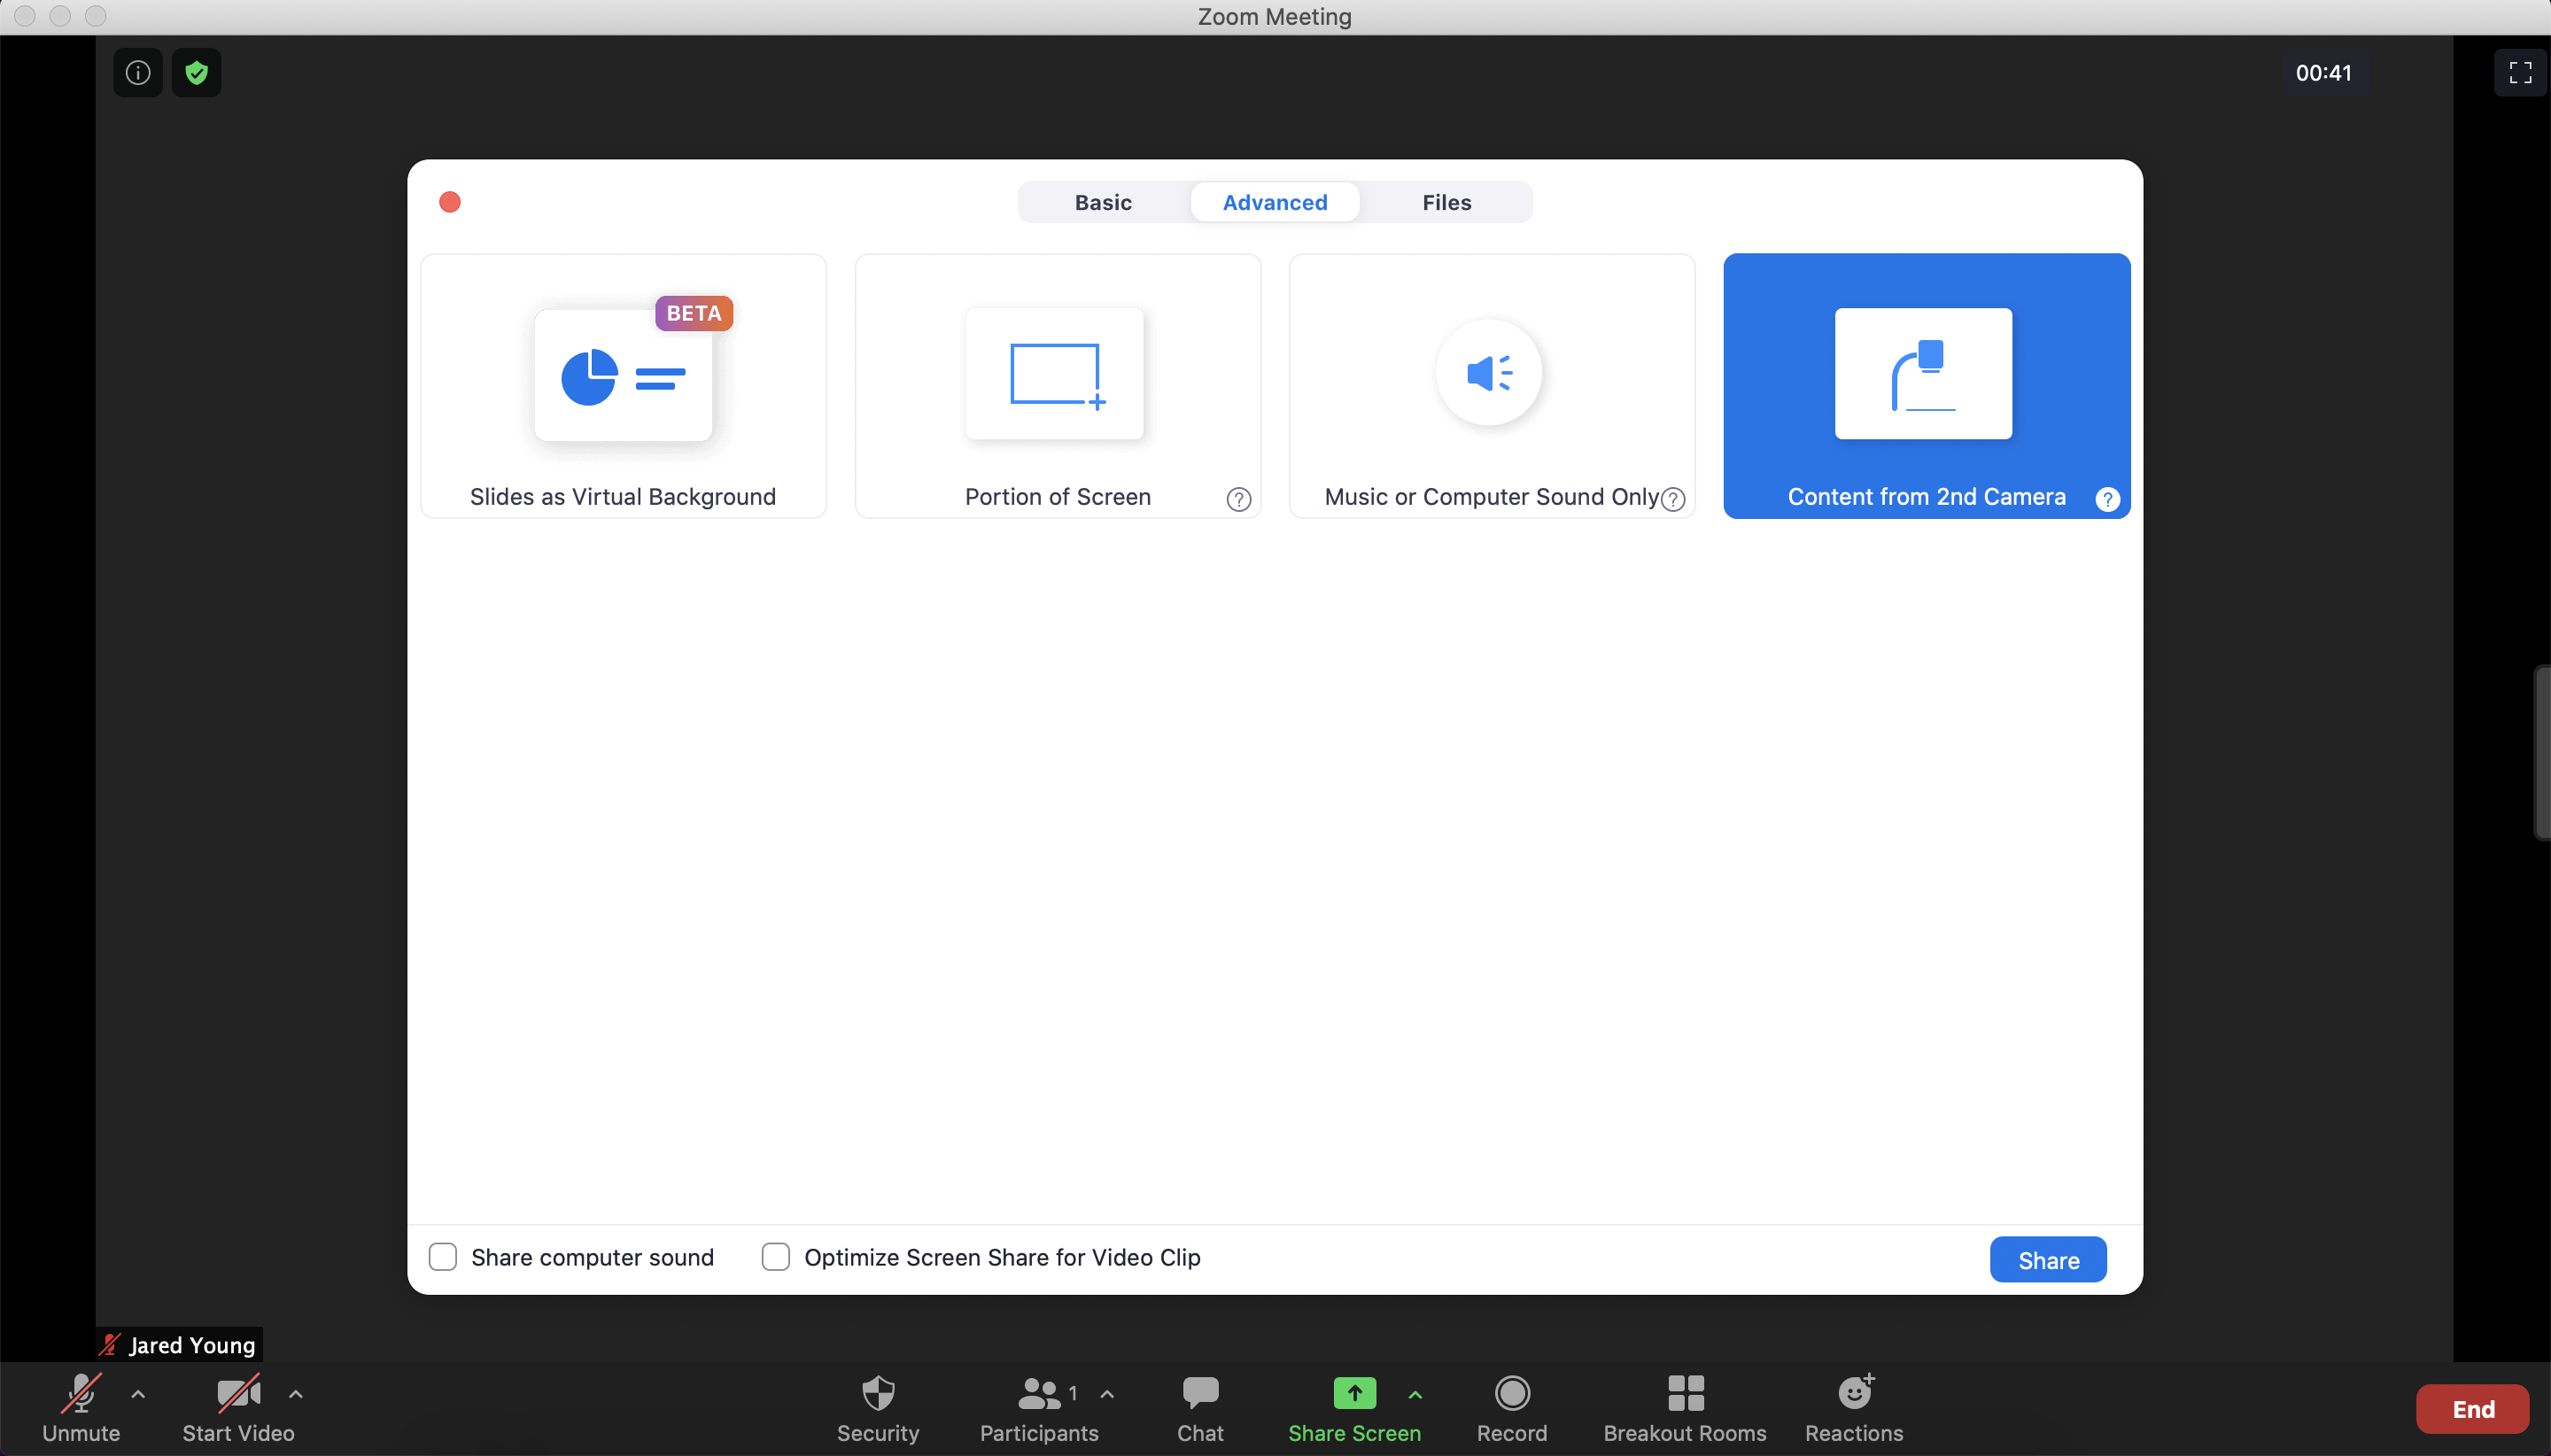
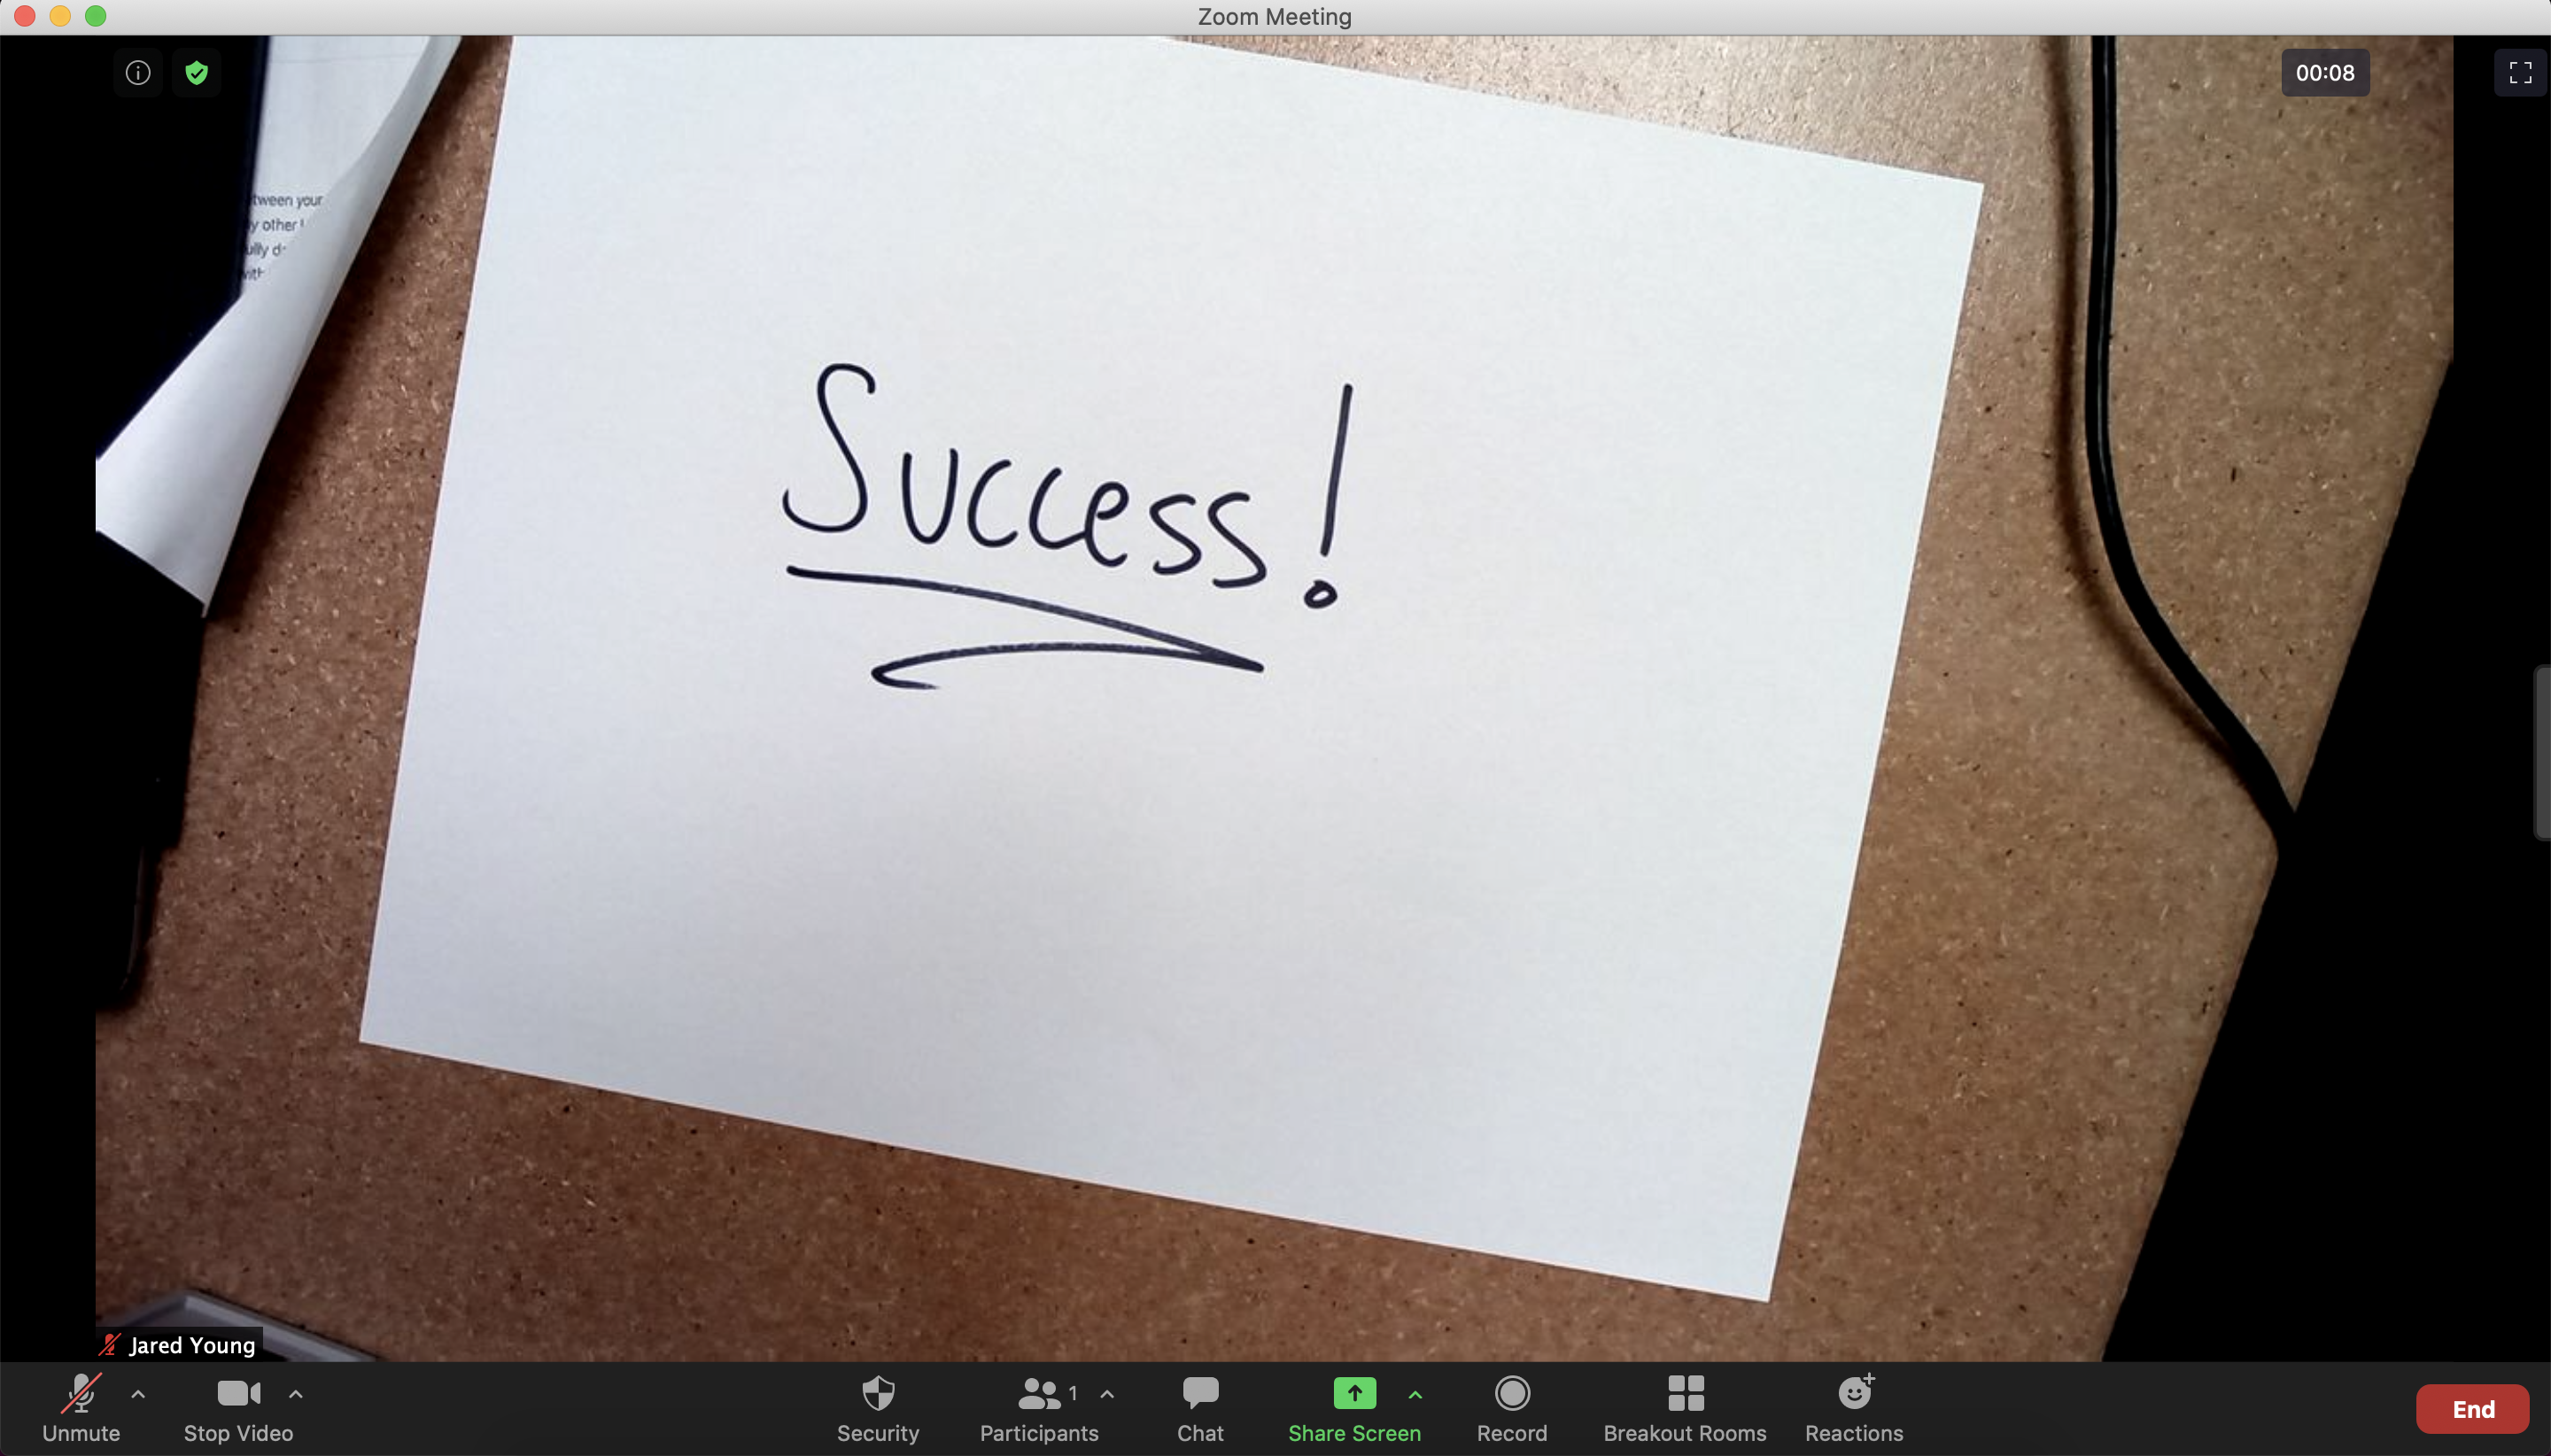
STEP 9: Alternatively, you can share this camera a secondary camera under Share Screen > Advanced > Select Content from 2nd Camera > Share
Comments
0 comments
Please sign in to leave a comment.